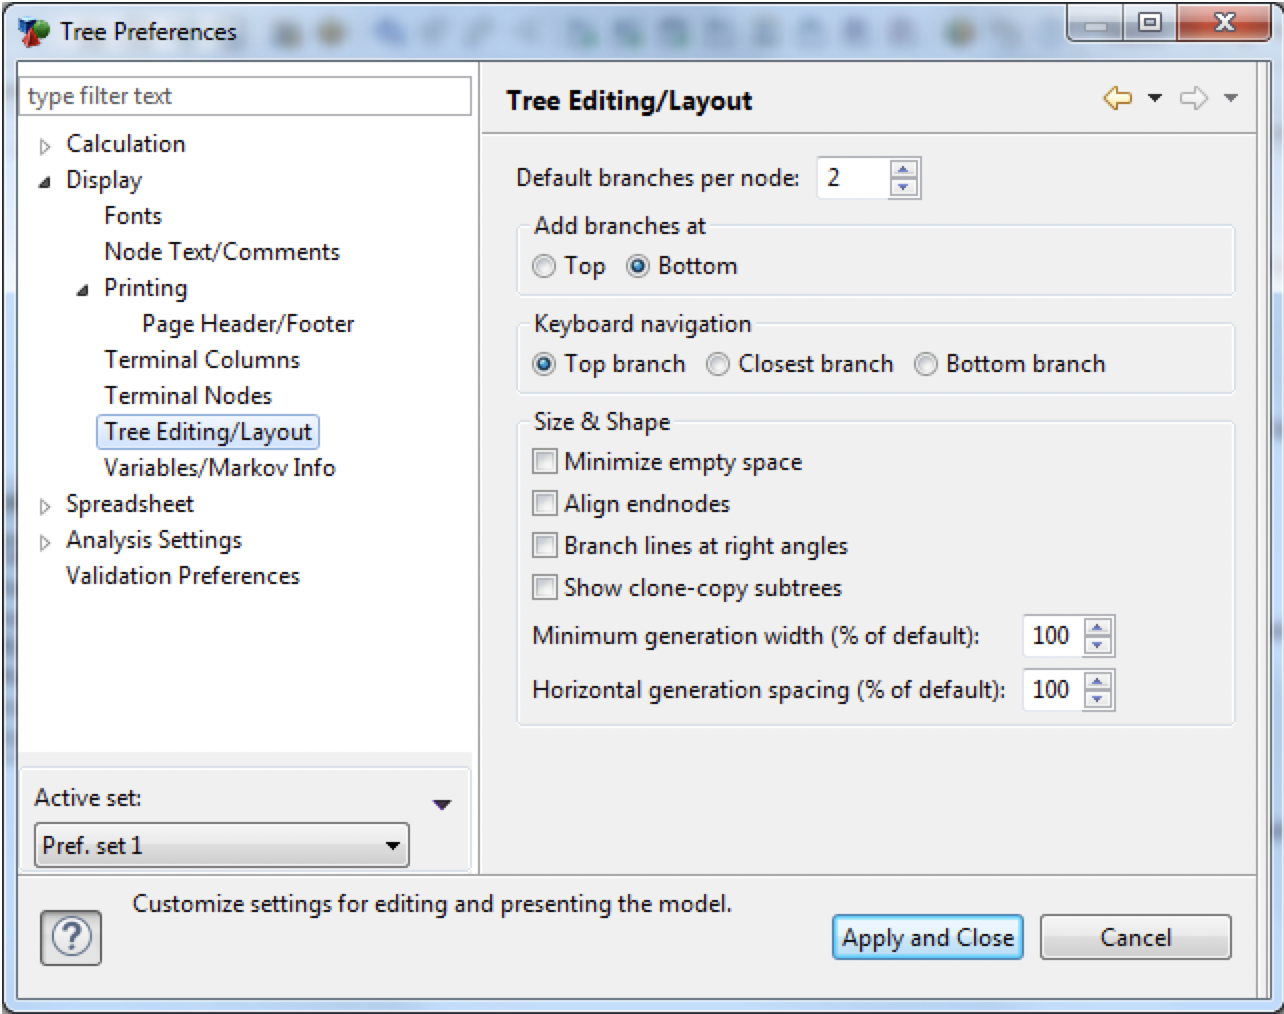
18.15 Tree Editing/Layout
The Tree Editing/Layout Tree Preferences category allows you to control a few editing and visual elements of the Tree Diagram Editor.
-
Default branches per node: Select the number of branches to add when you select Add Branches from the context menu at a node. The default number applies only the first time that branches are added at a given node. Once a node has branches, additional branches are added one at a time.
-
Add branches at: Select the location for new branches relative to existing branches when adding additional branches to a node. Dragging new nodes from the palette provides additional flexibility in this area.
-
Keyboard navigation: Select the branch to move to when using the right arrow to navigate from a node to one of its branches.
-
Minimize empty space: Check this box to produce a “compressed” version of your tree that minimizes empty space. Because each node no longer has its own horizontal “slice” of the tree display, this option may not be used with Align endnodes.
-
Align endnodes: Check this box to force all terminal nodes to line up at the rightmost edge of the tree.
-
Branch lines at right angles: Check this box to draw all branch connectors as vertical lines. By default branch connectors are drawn at whatever angle is needed to provide the most direct connection from one node to the next.
-
Show clone-copy subtrees: Check this box to display clone-copy subtrees; display of clone masters is not affected. When this option is selected, all clone-copy subtrees are displayed with their complete structure. When this option is not selected, only the name of the clone is displayed to the right of the clone-copy anchor node, which can dramatically reduce the visual size of your tree within the Tree Diagram Editor.